Fix Your Desk: The 5-Point Posture Checklist
If you spend long hours working at a desk, you've probably felt those familiar aches in your neck or back. While desk jobs are great for productivity, they can take a toll on your body if your workspace isn’t set up right. In fact, up to 65% of people who work desk jobs develop some form of pain or musculoskeletal issue (like back, neck, or shoulder pain) over time. The good news is that many of these problems are preventable. By making a few ergonomic tweaks, you can improve your posture, reduce pain, and boost your comfort throughout the workday.
Whether you’re an office worker, remote worker, or student, this beginner-friendly, 5-point posture checklist will help you fix your desk setup. We’ll cover how to sit correctly, arrange your chair and desk height, position your screen, place your keyboard and mouse, and the importance of taking breaks. Follow these tips to support your spine and stay healthy and pain-free at your desk!

1. Sit All the Way Back in Your Chair (Support Your Spine)
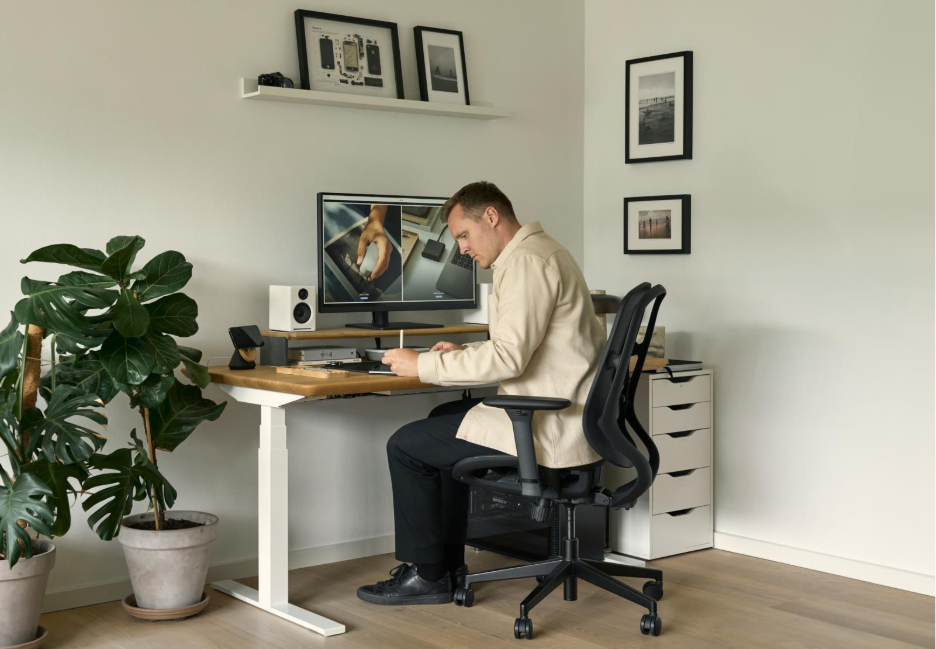
The foundation of good desk posture is how you sit. Start by sitting deep into your chair so that your back is fully against the backrest. This helps keep your spine in a neutral alignment, instead of slouching or perching on the edge of the seat. Your lower back (lumbar spine) should be supported by the chair’s backrest or a small cushion. Many office chairs have built-in lumbar support; adjust it to fit the curve of your lower back. By maintaining contact between your back and the chair, you prevent hunching and reduce strain on your spine.
While sitting upright, relax your shoulders. They should be down and back, not scrunched up toward your ears. Let your upper arms hang naturally at your sides. Avoid leaning forward or craning your neck out – keep your head aligned over your shoulders so your ears are roughly above your shoulders. If you catch yourself slumping or sliding forward in your chair, reposition and sit back again. A properly adjusted chair makes it easier to maintain good posture without constant effort, so take time to tweak your chair settings (height, tilt, back tension) to find a supportive, comfortable position.
Tip: Keep your legs uncrossed and feet flat on the floor while sitting. Crossing your legs or sitting on one foot can twist your lower body and throw off your alignment. We’ll talk more about ideal foot placement next.

2. Adjust Your Chair Height and Foot Placement
Once you’re seated with your back supported, check your chair height. Proper height ensures your lower body is in a neutral posture. Your thighs should be parallel to the floor, and your knees about level with (or just slightly below) your hips. In other words, you want roughly a 90° angle at your knees. This position helps distribute your weight evenly and avoids putting pressure on the backs of your legs.
Your feet should rest flat on the floor — this provides a stable base and promotes good circulation. If your feet don’t comfortably reach the floor because the chair is too high, use a footrest (or even a sturdy box or a stack of books) to support your feet at the proper height. Dangling feet or tippy-toes can strain your legs and lower back, so it’s worth elevating the floor to meet your feet if needed. Conversely, if your knees are coming up higher than your hips (chair too low), raise the chair height. Most office chairs have a pneumatic lever to adjust height – set it so that your hips and knees form those 90° angles with feet grounded.
Also, ensure you have plenty of leg room under your desk. Remove any trash cans, boxes, or clutter that force you to tuck in your legs or sit at an awkward angle. You should be able to scoot your chair in and sit close to the desk without bumping your knees. By giving your legs space and proper support, you’ll improve your comfort and prevent issues like knee pain or poor circulation (ever felt tingling in your feet after sitting too long? Often, that’s from improper leg positioning).
Quick Chair Height Checklist:
-
Hips level with knees: Adjust chair so your hips aren’t significantly higher or lower than your knees (aim for ~90° bend at the knees).
-
Feet flat on floor: Use a footrest if your feet don’t reach comfortably.
-
Thighs parallel: Your thighs should be horizontal, not angled up or down.
-
Legs uncrossed: Keep feet about hip-width apart, legs not crossed or twisted.
-
Free space under desk: Clear out obstructions so you can sit close and align properly.
Adjusting your chair and leg position with these points in mind will set the stage for good overall posture.
3. Place Your Monitor at Eye Level (No Neck Crane)
Do you ever find yourself craning your neck to see your screen? If your monitor is too low, you’ll constantly look down, straining your neck. Too high, and you might tilt your head back uncomfortably. The ideal monitor position is at eye level, directly in front of you. Aim to position the top of your screen at (or slightly below) eye height when you’re sitting up straight. This way, you can gaze at the screen without bending your neck up or down. Your head weighs a lot, and every degree of tilt adds stress to your neck and upper back. By keeping your monitor at eye level, you maintain a neutral head position and help avoid that dreaded “tech neck” stiffness.
Equally important is the distance of the monitor from your eyes. A good rule of thumb is about an arm’s length away (roughly 20 to 40 inches, or 50–100 cm). At this distance, you shouldn’t have to lean forward or squint to read the screen. It also helps reduce eye strain. If you have a larger monitor, you might place it a bit further back; with a smaller laptop screen, you may sit slightly closer – but try to stay within that range. Adjust the screen angle to avoid glare and ensure you can view it comfortably without tilting your head.
For dual monitors, put the primary one centered in front of you, and the secondary off to the side. If you use both equally, center them to minimize twisting your neck. And don’t forget about your laptop: if you work on a laptop for long periods, consider getting a laptop stand or external monitor to raise the screen up to eye level. Using an external keyboard and mouse (more on that next) with a raised laptop can mimic a desktop setup and save your neck from hunching over a low screen.
By keeping your monitor eye-high and at a comfortable distance, you’ll naturally sit with a level head and reduce the risk of neck and shoulder pain. Bonus: a properly positioned screen can also cut down on eye fatigue and headaches that come from straining to see a poorly placed display.

4. Position Your Keyboard and Mouse for Comfort (Elbows at 90°)
With your chair and monitor set, it’s time to arrange your keyboard and mouse – the tools you probably use most. Keyboard height and position should allow your arms to relax and your wrists to stay straight. Pull your keyboard close enough so you don’t have to reach for it; it should sit directly in front of you, aligned with the center of your body. When typing, bend your elbows about 90 degrees and keep your upper arms close to your sides. Your forearms should be roughly parallel to the floor (a sign that your desk or keyboard tray is at the correct height).
Keep your wrists in a neutral position – that means straight, not bent up or down. You might need to adjust the tilt of your keyboard or use a wrist rest to achieve this. Many keyboards have little legs in the back that angle them; often, it’s actually more ergonomic to keep the keyboard flat or only slightly tilted, so your wrists aren’t cocked upward. According to ergonomic guidelines, hands, wrists, and forearms should be in a straight line while typing. If your desk has a sharp edge, consider adding a pad or wrist rest to cushion your wrists and prevent pressure on that area.
Place your mouse right next to your keyboard, at the same height. You shouldn’t have to stretch or reach far to use it. Hold the mouse lightly (no death grips!) and keep your wrist straight as you move it. If possible, adjust the mouse sensitivity higher so that you can cover more screen area with smaller, more relaxed movements – this can reduce strain on your wrist and shoulder over time.
One often-overlooked factor is arm support. If your chair has armrests, adjust them to a height where they just support your forearms when your shoulders are relaxed. You don’t want armrests so high that they make your shoulders hunch up, or so low that you end up leaning to one side. When set correctly, armrests can take some weight off your shoulders and neck, reducing tension. If you don’t have armrests, you can also rest your forearms on the desk from time to time to alleviate the load. The key is to avoid holding your arms up in mid-air for long periods – that’s a recipe for shoulder and neck fatigue.
Summary of Keyboard & Mouse Ergonomics: Keep your elbows bent at 90° and close to your body, wrists straight and in line with your forearms, and shoulders relaxed. Adjust your equipment or chair so that your arms naturally fall into this position when you type. This will help prevent issues like carpal tunnel syndrome (from bent wrists) and shoulder pain (from reaching or tensing up). By designing your desk so your keyboard and mouse “meet” your hands where they naturally rest, you’ll be able to work comfortably for longer stretches.

5. Take Regular Breaks and Move Around
Ergonomics isn’t just about the furniture – it’s also about your habits. No matter how perfect your setup is, staying in one position for too long is not healthy. Our bodies are meant to move. When you sit still for hours, muscles get stiff, circulation slows, and you can develop soreness even with ideal posture. The remedy is simple: take regular breaks and change positions frequently. Aim to stand up, stretch, or walk a little at least once every hour. Even a quick 2-minute walk to the water cooler or a set of stretches at your desk can work wonders to reset your posture and get your blood flowing.
A popular guideline is the “20-8-2 rule”: every half-hour, spend about 20 minutes sitting, then 8 minutes standing, then 2 minutes moving (stretching or walking). You don’t need to follow that exactly, but it illustrates the importance of mixing in movement. Some experts simply suggest a 5-minute break every 30–60 minutes of sitting – find a rhythm that works for you. During these breaks, you can do some quick desk stretches (roll your shoulders, gently twist your spine, stretch your neck) or take a short walk. Not only do these breaks relieve muscle tension, they can also help clear your mind and improve your focus and productivity when you get back to work.
If possible, try alternating between sitting and standing while you work. Using a standing desk or even improvising with your laptop on a higher surface for part of the day can give your body a different position. When standing, the same posture principles apply (keep your monitor at eye level, wrists straight, etc.). The point is to avoid being locked into one posture all day. Frequent movement is one of the best things you can do to prevent pain and stiffness. Set a reminder on your phone or computer if you tend to forget to take breaks. Your body will thank you, and you’ll likely feel more energized.
Finally, remember to listen to your body. If you notice discomfort or fatigue in a certain area (say, your right shoulder), that’s a cue to adjust your position or do a quick stretch for that area. Over time, regular breaks and posture checks will become second nature.

Conclusion & Next Steps
By following this 5-point posture checklist, you can transform your desk into an ergonomic haven. Small changes – like raising your monitor, adjusting your chair, or simply sitting back in your seat – make a huge difference in how you feel at the end of the day. Instead of tight shoulders and an achy back, you’ll have more energy and less pain, which is not only great for your health but also for your productivity and mood.
It might feel like a lot to remember at first, but start with one or two changes and build up. Even today, take a moment to fix your setup: level your screen with your eyes, check that your feet are supported, and relax those shoulders. Over time these healthy habits will become automatic. Your posture and well-being are worth it!
Call to Action: If you found these tips helpful, consider subscribing to our newsletter for more expert-backed health and productivity guides. You’ll get regular tips on staying healthy and comfortable while working, right in your inbox. Plus, check out our related articles on office ergonomics and wellness to continue learning. Here’s to a healthier, pain-free workday – your body will thank you for it!
Comments